Unmasking Leak Location Clues Behind Dry Patches
A lot of Keller homeowners assume leaks announce themselves with obvious puddles. Then the strangest thing happens: you notice dry-looking patches on the floor—maybe near a baseboard, under an area rug, or on the edge of a tile—while your water bill keeps climbing. Sometimes you’ll even smell a faint musty odor that doesn’t match the rest of the house.
That combination is a big clue. Hidden plumbing leaks don’t always soak the surface. In slab-on-grade homes, water can travel through the path of least resistance under flooring, then dissipate or evaporate at the surface in spots—leaving you with “dry” areas that still correlate to an active leak somewhere nearby.
When you’re dealing with a hidden leak, the question isn’t just whether water is escaping. The question is where it’s escaping—and what’s the safest way to verify it before repairs turn into guesswork.
Quick Answer
Dry patches can still be the aftermath of a hidden leak because water may move under flooring or concrete and only show up intermittently. The most reliable way to pinpoint it is a professional leak location service that tests pressure/flow, checks moisture patterns, and uses specialized diagnostics (especially for slab and foundation-related leaks). If your water use is rising or you see recurring dampness or odors, don’t wait for a bigger failure—early leak location reduces the chance of foundation and slab damage.
Signs You May Be Dealing With a Hidden Leak (Even If It Looks Dry)
Dry spots don’t rule out leaks. Here are the “tell-tale” clues we see that often get misread as normal wear, humidity, or surface-level issues:
- Your water bill increases without a clear cause (no extra laundry, irrigation changes, or new occupants).
- Intermittent dampness: a spot looks dry most days, but shows discoloration or softness after a rain or overnight.
- Musty odors near floors, closets, or along exterior walls—even when surfaces look clean.
- Cracks that appear “randomly” or widen slightly over time near bathrooms, kitchens, or laundry rooms.
- Temperature differences: a floor area feels cooler or warmer than surrounding sections (water movement can affect local temperatures).
- Toilet behavior changes: recurring fill cycles or slow leaks that don’t always leave puddles.
A realistic emergency scenario we’ve handled
One Keller homeowner called after noticing their garage slab looked “fine,” but their ceiling stain inside the adjacent room kept returning after drying out. They assumed it was a roof leak because the ceiling stain appeared after rain. After shutting off fixtures and isolating the water system, we found the leak wasn’t coming from above at all—it was under-slab water migration that traveled to a different path during moisture conditions. The dry periods were part of why it took time to connect the dots.
How Leak Location Clues Actually Work (Technician Insight)
From a diagnostic standpoint, “dry patches” often mean water is escaping in a way that doesn’t saturate the surface immediately. In slab and foundation situations, water can:
- move laterally under concrete,
- seep into backfilled areas or construction voids,
- follow plumbing penetrations where the slab was cut or where lines were tied in,
- and then emerge only when conditions change (humidity, temperature shifts, or water pressure cycles).
A firsthand observation from the field: when we inspect around bathroom and kitchen plumbing, we often find that the most visually innocent areas (like a clean tile section or a rug patch) are exactly where moisture sensors detect abnormal readings—because water had time to travel under the assembly.
That’s why we don’t treat “dry” as “safe.” We treat it as “a clue that the leak isn’t behaving like a surface drip.”
What professionals look for during leak location
A solid leak location process typically includes:
- Water meter monitoring: checking for flow when the home is supposed to be idle.
- Fixture isolation: confirming the leak is on the supply side vs. irrigation vs. sewer.
- Pressure/flow testing: determining whether the issue is consistent with a pressurized water line leak.
- Moisture mapping: checking for anomalies around slab edges, penetrations, and known pipe routes.
- Targeted verification: narrowing down the likely segment before recommending invasive work.
If you’re looking for a deeper look at the testing side, we often recommend homeowners review hydro-static testing as a starting point for diagnosing pressurized line issues.
What Homeowners Often Overlook
Hidden leaks rarely fail in a dramatic single moment. More often, they start small and create subtle conditions that mask themselves.
Here are the oversights we see most frequently:
- Assuming “no puddle” means no leak. Under-slab leaks can be slow, intermittent, and surface-dry.
- Ignoring seasonal changes. North Texas weather swings can change soil moisture and how water migrates beneath concrete.
- Not correlating water usage with daily routines. A leak may only be active during certain pressure windows (morning showers, dishwasher cycles, or tankless hot water calls).
- Treating recurring odors like ventilation issues. Musty smells can be moisture movement—even if no wetness is obvious.
Common Mistakes That Lead to Water Damage
Dry patches can tempt homeowners into waiting. Unfortunately, waiting is one of the most expensive decisions in leak situations—especially with slab and foundation plumbing.
Common mistake #1: Chasing the wrong source
People often assume a ceiling stain, damp baseboard, or discoloration is always a roof or exterior drainage problem. Those can be real, but they can also be red herrings. If the water usage is rising, plumbing must be ruled out before you commit to exterior repairs.
Common mistake #2: Relying on guess-and-cut repairs
Opening floors or chasing suspected line routes without confirming the exact leak location can:
- destroy additional flooring,
- increase repair costs,
- and still miss the true source if the leak is traveling under the slab.
Common mistake #3: Delaying slab leak verification
For slab-related issues, early detection matters. The longer water moves beneath concrete, the more it can affect subgrade conditions and contribute to foundation-related concerns.
If you’re dealing with slab-specific symptoms, it helps to understand slab leaks and how they differ from typical wall or under-sink leaks.
Common mistake #4: Treating “dry” as “fixed”
Sometimes a repair is made to a visible pipe segment, and then the leak seems to stop—only to reappear elsewhere later. That can happen when the true leak pathway was under-slab and the water continued migrating.
Repair, Diagnostics, or Prevention: What to Do Next
If you suspect a hidden leak behind dry patches, your best next step is to confirm the source and location before repairs escalate.
Recommended diagnostic path (practical and homeowner-friendly)
1. Confirm whether the leak is on the water supply side
- If the water meter shows usage when everything is off, you’re dealing with a supply leak or fixture issue.
2. Isolate fixtures and zones
- Toilets, washing machines, water heaters, and outdoor irrigation can all mimic “mystery” leak symptoms.
3. Use leak location methods that match the construction
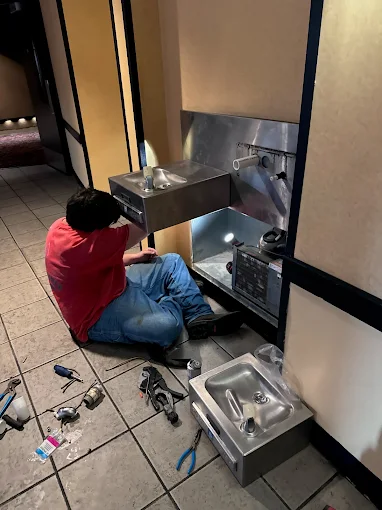
- For slab areas, targeted slab leak location techniques are critical. This is where leak location repair becomes more than a buzz phrase—it’s the difference between targeted work and unnecessary demolition.
4. Verify before you open
- The most cost-effective repairs are usually the ones you can confidently connect to the leak’s actual path.
An anonymized case example (how dry patches mislead)
A homeowner in a North Texas neighborhood noticed a slight discoloration line near a bathroom wall, but the floor stayed mostly dry. Their water bill didn’t spike dramatically at first, so they delayed calling. Over a few weeks, the discoloration returned after the home’s morning water use, and they also noticed a faint odor near the baseboards.
During diagnostics, we found the leak wasn’t at the visible surface plumbing route—it was consistent with a leak traveling under the slab toward a different emergence point. Once the leak segment was verified, the repair stopped the migration and the “dry patch” behavior resolved. The homeowner avoided repeated surface checks and unnecessary floor lifting because the leak location was confirmed first.
Slab leak-specific guidance
If you suspect slab involvement, consider a dedicated slab leak location service approach. Slab leaks require verification methods designed for concrete assemblies and concealed piping routes.
Quick Comparison: Repair Options vs. Replacement (When Slab or Pipe Work Is Involved)
| Situation | Common Recommendation | Why It Makes Sense |
|---|---|---|
| Single confirmed leak segment | Targeted slab leak repair | Minimizes demolition and addresses the active source |
| Multiple weak sections or repeated repairs | Consider piping strategy / broader repair plan | Prevents “whack-a-mole” failures |
| Ongoing drainage failure near slab areas | Pipe repair or line replacement strategy | Stops recurring water intrusion and sink/backup problems |
If the underlying issue is affecting multiple segments (or if the home has older piping), we’ll talk through the long-term reliability angle rather than pushing the smallest short-term fix.
Keller and North Texas Relevance: Why This Shows Up Here
Keller sits in a part of North Texas where homes commonly experience a mix of factors that make hidden leaks harder to notice early:
- Shifting clay soil and seasonal moisture changes can alter how water migrates under slabs.
- Suburban growth and older plumbing runs in some neighborhoods means mixed material ages and legacy routing.
- High outdoor water demand in summer can mask early plumbing losses—especially if irrigation isn’t clearly separated from indoor supply.
- Foundation and slab sensitivity: once water moves under concrete for long periods, the risk isn’t just flooring damage; it can become a foundation concern.
That’s why we focus on verification, not vibes—especially when dry patches and “nothing seems wet” are part of the story.
Plumbing Maintenance Checklist (Prevention You Can Do)
You can’t prevent every leak, but you can reduce the chance that a small leak becomes a major repair. Here’s a practical checklist homeowners can follow:
- Check your water meter periodically
- If it moves when the house is idle, investigate.
- Inspect toilets monthly
- Look for slow leaks using food coloring or a quick tank test.
- Watch for pressure changes
- Sudden fluctuations can signal failing components.
- Keep an eye on recurring odors
- Musty smells near floors can indicate moisture movement.
- Run hot water selectively if you have a tankless system
- If performance changes, don’t ignore it—hard water and scale can worsen system stress over time.
- Schedule periodic plumbing inspections
- Especially before major seasonal changes.
If your issue overlaps with drain or sewer concerns, it’s also worth reviewing sewer repairs and drain cleaning services—because sometimes “hidden water” problems are actually drainage or sewer line behavior.
Ready to Protect Your Home From Plumbing Damage?
Dry patches can be deceptive. If your water usage, odors, or recurring discoloration don’t match what you’re seeing, treat it as a diagnostic problem—not a cosmetic one. The fastest way to stop costly damage is to confirm the leak location with methods designed for concealed plumbing in slab and foundation areas.
About All Source Plumbing
All Source Plumbing provides slab leak detection, drain repair, hydro jetting, sewer diagnostics, tankless water heater services, and emergency plumbing repairs throughout Keller, TX and surrounding North Texas communities. The company focuses on accurate plumbing diagnostics, long-term repair solutions, preventative maintenance, and helping homeowners protect their properties from costly water damage through professional plumbing services.
Helpful references:
- slab leak location repair
- hydro-static testing
- leak location repair
- general plumbing repairs
FAQ: Dry Patches, Hidden Leaks, and Next Steps
Can a leak really cause dry patches on the floor?
Yes. Hidden leaks—especially under slabs—can move water through the sub-surface and only intermittently affect the visible area. In some cases, water evaporates at the surface while moisture continues migrating underneath, leaving “dry-looking” spots that still correlate with abnormal water use or odors.
How do professionals find the leak location when nothing looks wet?
We start with meter and fixture isolation, then move to pressure/flow testing and moisture mapping. The goal is to narrow down the likely pipe route and verify before opening walls or floors. This reduces unnecessary demolition and helps ensure the repair actually addresses the active leak.
Is slab leak detection destructive?
It depends on the approach. Non-destructive methods (like testing and mapping) can narrow the source substantially. If verification requires access for final confirmation or repair, that work should be targeted to the confirmed segment—not broad “guessing.”
What’s the biggest risk of waiting to call for leak detection?
The longer a hidden leak persists, the more it can degrade subgrade conditions under concrete and increase the likelihood of moldy odors, floor damage, and foundation-related concerns. Early confirmation often means smaller repairs and fewer secondary issues.
Should I repair or replace if I’ve had leaks before?
If there’s only one confirmed leak point, targeted repair is often the most cost-effective. But if diagnostics suggest multiple weak segments or repeated failures along the same line path, a broader repair plan may prevent future disruptions and repeated demolition.