
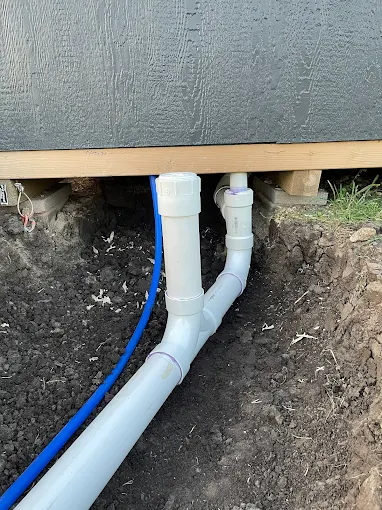
Moist Baseboards Reveal Leak Location Behind Dry Walls
A few weeks after moving into a Keller, TX home, the homeowner noticed something that didn’t quite “match” the rest of the house—baseboards along one exterior wall stayed slightly damp. No obvious spray, no puddles, and the drywall looked mostly fine. But every morning, the sheen on the trim was back, and the wood at the bottom of the wall felt cooler than the surrounding areas.
In North Texas, that combination—moist baseboards with otherwise normal surfaces—often points to a hidden water leak somewhere behind the drywall. And the tricky part is that a leak can be actively damaging materials long before it’s obvious. By the time the discoloration spreads, the leak may already have affected subflooring, insulation, and even the soil under a foundation.
Quick Answer
Moist baseboards usually mean water is migrating behind the wall (or coming up from below), and the leak may be supply plumbing, a connection, or—less commonly but more expensively—a slab leak. Professional leak detection uses pressure testing, moisture mapping, and targeted diagnostics to identify the exact location without tearing out walls unnecessarily. If the leak is on or near a slab, early detection helps prevent soil erosion and foundation-related issues.
When a Leak Shows Up at the Baseboard, Here’s What It Usually Means
Baseboards are the “edge” where water becomes visible. That doesn’t mean the leak is at the baseboard—it means that’s where moisture collects or wicks through materials.
From my experience diagnosing hidden leaks in North Texas homes, the most common pathways that lead to damp trim are:
- Supply line leaks behind drywall: A pinhole, cracked fitting, or failing valve can drip intermittently. Water then travels downward through drywall paper, studs, and insulation.
- Condensation mistaken for leaking: Bathrooms and exterior walls can create persistent dampness due to humidity, poor ventilation, or temperature swings—but condensation typically follows patterns and doesn’t usually coincide with active water use.
- Under-slab or slab-edge leaks: If the moisture is consistently near a wall that sits over plumbing runs or near a foundation edge, we have to consider slab leak plumbing repairs as well.
A firsthand technician observation (what we look for on site)
When we’re called out for “wet baseboards,” one of the first things I check is whether the dampness is uniform along the wall or localized to a specific section—especially around corners, penetrations, or near where water lines would logically run (fixtures on the opposite side, laundry connections nearby, or kitchen/bath layouts).
Localized moisture often means a specific leak source (a joint or fixture supply), while more even dampness can suggest moisture movement from below, changes in the slab perimeter environment, or a broader plumbing issue.
Signs You May Have a Hidden Leak
Moist baseboards are the headline sign, but homeowners often report additional clues, such as:
- Musty smell near one room or along an exterior wall
- Persistent damp drywall at the bottom edge after showers or irrigation cycles
- Unexplained water bill increases
- Paint bubbling or staining that slowly “creeps”
- Flooring that feels soft or slightly spongy near baseboards
- Small “wet spots” that appear after water use, but don’t match a visible drip
Emergency scenario we see in the field
One of the most urgent calls we get starts with “just a little moisture by the trim.” The homeowner had also noticed their water bill rising, but they assumed it was a toilet fill issue. When we arrived, the baseboard was wet to the touch in multiple spots—and the moisture was tied to a failing shutoff valve feeding a line behind the wall. The leak wasn’t spraying; it was feeding water into a cavity behind the drywall, which then expanded into a larger water-damage zone before anyone realized how active it was.
If you suspect a leak and it’s worsening, shut off the water supply to the affected area (if you can do so safely) and call for diagnostics before you open up walls “blind.”
What Homeowners Often Overlook
There’s a common misconception that if a leak isn’t obvious—no puddles, no dripping faucet—it must be minor. Hidden leaks don’t follow that logic.
Common mistake homeowners make
Waiting until the drywall looks bad.
By the time stains spread across the wall surface, the leak may have already traveled into insulation, subfloor edges, and crawl spaces (depending on layout). In slab or slab-edge situations, delays can also increase the risk of foundation-related problems because soil and slab support conditions can change over time.
Another frequent mistake: trying to “find it” by feel—pressing on baseboards, chasing dampness, and opening random sections of drywall. That can create more damage than the original leak and still not pinpoint the source.
Our Experience Diagnosing Plumbing Problems in Texas Homes
North Texas homes come with a few practical realities that affect leak detection:
- Hard water can contribute to mineral buildup in plumbing fixtures and connections, which sometimes makes small leaks harder to detect visually because the area “looks clean” on the outside.
- Seasonal temperature swings can affect how moisture behaves—sometimes making dampness more noticeable after irrigation schedules or after the home cycles heating/cooling.
- Foundation and soil movement in the region can shift plumbing stresses over time, which is one reason we don’t assume every hidden leak is “just a pinhole behind drywall.”
Where the leak often is (and why it stays hidden)
In many cases, the source isn’t a dramatic break—it’s a joint:
- a coupling that has weakened
- a cracked fitting behind a wall
- a supply line that has been stressed by movement
- a line that was previously patched but never fully corrected
When that happens, water can enter the wall cavity slowly, drip down behind baseboards, and only show up when conditions are right.
Repair vs. Diagnostics: What We Recommend First
The goal is simple: identify the leak location accurately before you decide on repair scope. Opening walls without a plan is expensive and rarely efficient.
Recommended next step
A professional leak location process typically includes a mix of:
- Leak Detection (testing and monitoring) to confirm the leak is active and determine the general zone
- Moisture mapping to understand where water is collecting and migrating
- Targeted pressure testing or other diagnostics to narrow down whether the issue is in a wall run, under a slab, or near a foundation edge
If the moisture patterns align with slab plumbing routes or if pressure testing suggests a slab-side issue, we move into slab leak diagnostics rather than continuing to open drywall.
For homeowners who want to understand how slab leak investigations are handled, you can review our approach here: slab leak location diagnostics.
When you may need slab leak detection (not just wall repair)
If the damp baseboards are near exterior walls and the leak seems tied to the foundation area, we consider under-slab causes early. That matters because slab leak repair often requires different planning than behind-wall pipe work.
You can also explore our slab-focused service overview: slab leak detection service.
Case Example: The “Dry Wall Looks Fine” Situation
Here’s an anonymized example that mirrors what many Keller homeowners experience:
A customer called about moist baseboards in a hallway. The drywall paint wasn’t peeling yet. There was no visible drip, and the homeowner believed it might be condensation because the issue appeared mostly in the morning.
Our technician performed a diagnostic walkthrough and checked water usage patterns. The moisture localized near a section of the hallway wall aligned with the plumbing run that fed nearby fixtures. We then ran targeted leak location diagnostics to confirm an active plumbing leak rather than humidity-related condensation.
Once we narrowed the area, repair planning focused on the actual source location behind the wall instead of cutting broadly. The result was a cleaner repair path and less disruption for the homeowner.
The key lesson from that case: baseboards can be the final “destination” of water travel, not the origin.
Keller and North Texas Relevance: Why This Happens More Often Here
In Keller and surrounding North Texas communities, homeowners frequently deal with plumbing systems that have been influenced by:
- older slab and foundation plumbing layouts
- hard water scale effects
- subtle foundation movement over time
- high summer water usage that makes small leaks easier to notice through bills and moisture patterns
Moisture near exterior walls can also be affected by how homes manage humidity—especially if insulation and ventilation aren’t ideal. That’s why a correct leak location service matters: it prevents misdiagnosis and avoids unnecessary demolition.
If the leak is truly hidden, early detection helps you keep the damage limited—before it becomes a drywall project, a flooring replacement, or a foundation concern.
What Actually Improves Long-Term Plumbing Reliability
Once the leak location is confirmed, the best “long-term fix” isn’t just stopping the drip. It’s preventing the surrounding system from failing again.
Depending on what’s causing the moisture, the best outcomes come from:
- repairing the actual failed component (not just patching the symptom)
- considering replacement when connections or sections are degraded
- updating shutoffs or access points so future diagnostics are faster
If the leak involves broader piping segments—especially if multiple sections show age-related failure—homes may benefit from a repiping plan rather than repeated localized repairs. You can read more about that approach here: piping repiping.
Plumbing Maintenance Checklist (to Reduce Hidden Leak Risk)
You can’t prevent every leak, but you can catch problems earlier. Here’s a practical checklist homeowners can use:
- Check water meter behavior: If no water is used and the meter still moves, investigate.
- Inspect baseboards and corners monthly for dampness, staining, or peeling paint.
- Look for recurring musty odors near bathrooms, laundry areas, and exterior walls.
- Verify irrigation timing: Compare moisture changes with sprinkler schedules.
- Test toilets and valves: A slow-running toilet can mimic “mystery leaks.”
- Know where your shutoffs are: Faster response reduces damage if a leak starts.
- Keep ventilation strong in bathrooms and near exterior wall plumbing runs.
Repair, Replacement, or Diagnostics? A Simple Decision Guide
| Situation | What to Do First | Likely Path |
|---|---|---|
| Baseboards are repeatedly damp but drywall looks normal | Professional leak detection + moisture mapping | Repair behind wall or at a connection |
| Water use spikes and moisture matches plumbing run locations | Leak location service with targeted tests | Repair the failed segment |
| Moisture near foundation edges/exterior walls | Diagnostics that consider slab-side causes | Slab leak detection and slab leak plumbing repair planning |
| You’ve had repeated “patch” repairs | Full diagnostic review of the plumbing run | Consider replacement/repiping strategy |
Quick Keller Home Tip: Don’t Ignore the “Small” Signals
In Keller, homeowners often tell us the same thing: the leak “started small.” That’s normal for hidden plumbing problems—failures typically begin as slow seepage at fittings, joints, or valves.
The best approach is to treat early signs as a chance to reduce cost. Accurate leak location service is usually cheaper than repeated drywall repairs and flooring replacements caused by delayed detection.
FAQ
How do I know if my moist baseboards are from a leak or condensation?
Condensation usually correlates with humidity and temperature changes (often near bathrooms or exterior walls) and may not increase with water use. A leak tends to align with specific events—showers, laundry cycles, or irrigation—and can cause localized dampness or staining. A moisture map plus targeted leak detection is the fastest way to separate the two.
Can a hidden leak show up only on one section of the wall?
Yes. Leaks at a fitting, valve, or short section of pipe can create localized moisture that “collects” at the baseboard line. That’s why we focus on patterns—corners, penetrations, and the plumbing layout—rather than assuming the baseboard is the leak point.
Is non-destructive slab leak detection possible?
Often, yes. Non-destructive slab leak detection typically uses diagnostic testing to narrow the suspected area before any invasive work. If results point to slab-side involvement, we can plan the most efficient repair approach based on the leak location data.
What should I do immediately if I suspect an active leak?
If you can safely shut off water to the affected area, do so. Then document what you see (where the moisture appears and when it worsens). Avoid opening walls without diagnostics—cutting blindly can increase damage and delay the correct repair.
Ready to Protect Your Home From Plumbing Damage?
Moist baseboards aren’t something to “wait out.” Whether the source is behind the drywall or closer to a foundation line, the right leak detection and leak location service can prevent widespread water damage and reduce repair costs.
If you’re seeing damp trim, unexplained water bills, or recurring musty odors, the next step is professional diagnostics—so the repair addresses the true source, not just the symptoms.
About All Source Plumbing
All Source Plumbing provides slab leak detection, leak location service, drain repair, hydro jetting, sewer diagnostics, tankless water heater services, and emergency plumbing repairs throughout Keller, TX and surrounding North Texas communities. We focus on accurate diagnostics, practical repair planning, and long-term plumbing protection to help homeowners avoid costly water damage behind walls and under slabs.