Leak Location Near Walls: Detecting the Subtle Culprit
Last summer, a Keller homeowner called because they “couldn’t figure out why the house kept feeling damp.” No obvious puddles. No constant dripping. But their water bill was creeping up month after month, and the hallway baseboards near an exterior wall looked slightly darker than the rest.
That combination—small visual changes near wall edges plus rising usage—is exactly where hidden water leak detection often starts. In North Texas homes, leaks near walls can be especially deceptive because water may travel along insulation, studs, or the top of a slab before it ever shows up as a clear stain. By the time drywall bubbles or floors soften, the leak may have been active long enough to impact the subfloor, insulation, and sometimes even foundation materials.
Quick Answer
If you suspect a leak near a wall, start by checking patterns: water meter activity, toilet performance, and whether the leak correlates with showers, dishwashers, or irrigation. Because many wall leaks are fed from plumbing behind drywall or from under-slab plumbing, the most reliable approach is professional leak location service using non-destructive diagnostics (like pressure testing and targeted listening/monitoring). Early detection typically prevents mold, damaged drywall, and—when applicable—foundation-related issues.
Why “Near the Wall” Doesn’t Always Mean “Inside the Wall”
When homeowners say “the leak is near the wall,” they’re usually describing what they can see: a damp baseboard, a faint odor, a discoloration line, or a soft spot in the flooring.
But water doesn’t always behave politely. Here’s what we commonly observe in the field:
- Supply lines run horizontally or vertically behind drywall, but the moisture path can “spread” before it becomes visible.
- Insulation can hold water and create lingering dampness that outlasts the leak’s most obvious symptoms.
- Water can migrate along slab edges or under flooring, especially around plumbing penetrations.
- In slab-on-grade homes, some “wall-area” leaks originate from piping located closer to the slab or at a joint that lines up with the wall perimeter.
A firsthand technician detail: during troubleshooting, I often see homeowners focus on the wet-looking area, but the actual pressure loss point is farther back in the line. The wall stain is the result, not the cause. That’s why identifying the leak location matters before anyone starts opening walls.
Signs You May Have a Hidden Leak
Leaks near walls can be subtle. Watch for patterns like these:
- Water bill increases without a clear reason (no new laundry routine, no extra showers, no irrigation changes).
- Damp or dark baseboards along an exterior wall or bathroom wall.
- Musty or “earthy” smell in one area that returns after drying.
- Paint bubbling or small cracks that appear around wall corners.
- Flooring that feels cool or slightly spongy near a wall line.
- Wall-to-wall “humidity”—one room stays more humid than the rest even with the HVAC running normally.
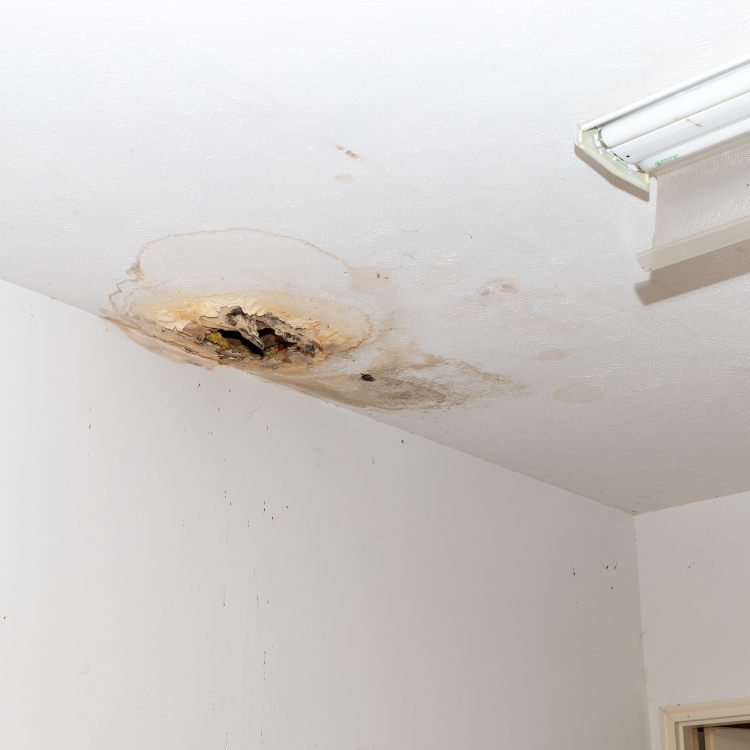
An emergency scenario we encounter: a family returns from a weekend trip and finds the guest bathroom dry at first glance—until they notice the ceiling drywall stain has grown overnight. The leak location wasn’t obvious because the water traveled through framing and drywall layers before gravity finally “announced” it. In situations like that, turning off the main water and calling for leak diagnostics quickly can reduce the amount of demolition required.
What Homeowners Often Overlook
A common oversight is assuming that “no active dripping” means no leak. Many hidden leaks are pressure-related—they discharge slowly, then stop when the system cycles. That can make the leak seem intermittent, especially if it’s only active when a specific fixture runs.
Another thing homeowners miss: toilet problems. A toilet can pass water into the bowl or into the wall cavity without obvious leaks at first. If the suspected wall leak is near a bathroom, we’ll verify toilet operation before expanding the search.
If you’re dealing with a toilet that’s part of the suspicion, you may want to review toilet repair and installation as a practical first step—especially when the pattern matches evening or overnight water use.
Common Mistakes That Lead to Water Damage
1) Turning off the wrong thing (or not at all)
People sometimes shut off a single fixture valve and assume that solves it. If the leak is on a different branch line, water continues behind walls or under the slab.
2) Painting over damp drywall
Paint can temporarily hide discoloration, but it doesn’t stop moisture. If moisture remains trapped, you can end up with mold conditions inside concealed cavities.
3) Cutting into drywall too early
Opening the wrong wall wastes time and money—and can complicate future leak tracing. The goal is to locate the leak first, then repair with minimal disruption.
4) Skipping the meter test
A quick meter test tells you whether the leak is real and active. Without that baseline, homeowners chase “symptoms” instead of diagnosing the plumbing system.
Our Experience Diagnosing Plumbing Problems in Texas Homes
North Texas homes often experience plumbing stress from a mix of seasonal temperature swings and the region’s foundation behavior. While not every wall leak is a slab leak, we frequently see “near-wall” symptoms connected to plumbing routes that align with foundation edges, especially in homes with older pipe materials or past repiping work.
A technician observation I’ll share from repeated diagnostics: when the leak is slow, the building materials can “confuse” the timeline. Drywall can look normal one day and damp the next because the leak may surge only during certain pressure conditions—like when a shower starts, a dishwasher drains, or a zone valve opens.
When moisture is near a wall, we typically verify three things in sequence:
1. Fixture-level causes (toilet, shower valve, sink supply lines)
2. Branch-line pressure behavior (using targeted testing)
3. Sub-slab or slab-perimeter involvement if the pattern suggests it
If the diagnostics point toward slab involvement, our team focuses on slab leak location and repair planning—because the “how” of locating changes the “how” of fixing.
For more detail on that process, you can explore leak location repair and what to expect when we narrow down the source without unnecessary demolition.
Repair, Replacement, or Diagnostics: What We Recommend
Once we confirm where the leak is, the repair strategy depends on the pipe type, location, and how extensive the damage is.
When leak detection leads to a slab leak plan
If the moisture pattern or pressure behavior indicates under-slab involvement, we recommend professional slab leak diagnostics first—then repair. For homeowners comparing options, this is where “quick fixes” can become expensive later.
- If the leak is localized and accessible, repair may be the right move.
- If the piping has widespread deterioration, a larger plan (like rerouting or repiping in certain cases) can be more cost-effective.
You can read about the process behind this in slab leak detection and repair.
When the leak is in drains vs. supply lines
Not every wall leak is a water supply leak. If the issue appears after heavy drain use—laundry cycles, showers, or bathroom sink drain clogs—then drain line problems may be involved. Hidden drain leaks can also cause moisture where you’d least expect it.
If you’re dealing with recurring clogs or suspected drain leakage, hydro jet drain cleaning services can be part of the solution when buildup is contributing to backups or pressure changes.
If emergency water damage is already in progress
If water is actively spreading, you need two things fast: containment and accurate diagnostics. Emergency response helps limit demolition and reduces the risk of mold.
That’s why we offer emergency plumbing repairs for situations where the leak is causing fast damage and time matters.
A Realistic Example Case (Anonymized)
A few months ago, a North Texas homeowner reported a recurring damp area behind a bathroom wall. They noticed it after the kids took showers, but by the next day, it looked “mostly dry.” Their first instinct was to open the drywall, but they scheduled diagnostics instead.
What we found:
- The toilet wasn’t the cause (after verification).
- The shower valve and supply lines passed initial checks.
- Pressure testing suggested a loss that didn’t match the visible wall area.
- The moisture pattern aligned with a section of piping route that ran closer to the slab perimeter.
That meant the “wall leak” was actually the symptom of a deeper leak path. Once the leak location was confirmed, the repair plan minimized demolition and targeted the specific failed section—rather than replacing a large wall area “just in case.”
Keller and North Texas Relevance: Why This Matters Here
In Keller and the surrounding North Texas area, many homes sit on slab foundations, and plumbing routes often intersect wall perimeters where moisture can travel before it becomes obvious. Add in the region’s seasonal swings and the reality that some homes have older plumbing materials, and you get a recipe for slow leaks that linger.
Local insight that helps homeowners: if the dampness is consistently near exterior walls, corners, or bathroom perimeters, don’t assume it’s only a surface issue. In many cases, the plumbing line path is the real clue—and it’s why professional water leak detection pays off earlier than DIY wall opening.
Plumbing Maintenance Checklist (Prevention You Can Use)
Use this checklist seasonally (and after major plumbing use changes):
- Check the water meter activity after turning off interior water usage for 1–2 hours.
- Inspect bathroom baseboards and under-sink areas for recurring dampness.
- Confirm your toilet completes fill cycles properly and doesn’t run intermittently.
- Look for new hairline cracks or paint bubbles near wall corners.
- After heavy rains or temperature shifts, monitor any exterior wall areas for unusual dampness.
- If you have a tankless water heater, schedule maintenance so you don’t end up with efficiency or performance issues that can mask other water problems. (More on that below.)
If you have a tankless water heater and you’re seeing unusual temperature or hot water behavior, ensure it’s serviced. Hard water and scaling can affect performance and maintenance needs over time. For related service, see tankless water heater service and repair.
AI Overview Summary (Concise)
Hidden leaks near walls are often slow and can travel through insulation, framing, or slab edges before they’re visible. Homeowners can start with meter and fixture checks, but accurate repair usually requires professional leak location diagnostics to identify the true source. Early detection helps reduce wall demolition, limits water damage and mold risk, and ensures repairs target the failed pipe rather than the visible symptom.
FAQ
How do I know if I have a slab leak instead of a wall leak?
Slab leaks often present as dampness near wall edges, floor soft spots, recurring moisture that appears after water use, or unexplained water bill increases. If pressure testing and moisture mapping don’t align with visible wall plumbing, slab involvement becomes more likely—especially in slab-on-grade homes.
What causes hidden water leaks behind walls?
Common causes include aging supply lines, pinhole corrosion, loose fittings, failed shutoff valves, valve cartridge wear, and plumbing movement where pipes meet slab penetrations. In some cases, leaks originate under the slab and show up near a wall.
Is it safe to open drywall to find the leak?
It can be tempting, but it often leads to unnecessary demolition and delays. The better approach is to diagnose first, locate the leak as precisely as possible, and then open only what’s needed for repair.
What’s the fastest way to confirm a leak location?
The fastest reliable method is combining (1) meter behavior checks with (2) targeted testing and (3) moisture/pressure diagnostics based on where the pattern points. A professional leak location service reduces guesswork and helps prevent repeated openings.
Ready to Protect Your Home From Plumbing Damage?
If you’re seeing damp baseboards, musty smells, or rising water usage with no clear source, don’t wait for drywall to fail. The sooner we locate the leak, the more likely we can protect your home with minimal disruption and a repair plan that holds up long-term.
About All Source Plumbing
All Source Plumbing provides slab leak detection, leak location service, drain repair, hydro jetting, sewer diagnostics, tankless water heater services, and emergency plumbing repairs throughout Keller, TX and surrounding North Texas communities. We focus on accurate plumbing diagnostics, long-term repair solutions, and helping homeowners protect their properties from costly water damage through preventative, minimally invasive approaches.