
Emergency Leak Location Response Checklist for Peace
The first sign is rarely dramatic. It’s usually something quieter—like your water bill creeping up again, a faint damp smell near a baseboard, or a “whoosh” you can’t explain that sounds like water moving behind a wall. In Keller and across North Texas, that slow start matters because our homes often sit on shifting clay soils and slab foundations that can be affected long before drywall or tile looks damaged.
One night, a Keller homeowner called us after noticing their slab area felt cooler than the rest of the room and a hairline crack in the floor looked slightly wider. No active pooling. No obvious puddle. But the moisture readings told a different story. Hidden leaks don’t always announce themselves with visible water—sometimes they’re just quietly draining pressure and drying out the wrong places.
This checklist is designed for that moment when you need calm, fast decisions—before the leak spreads, before mold has time to move in, and before you end up paying for more repair than you should.
Quick Answer
If you suspect a hidden water leak, your priorities are:
- Stop the water flow (turn off the main shutoff if needed).
- Reduce water damage risk (move valuables, open affected areas if safe, and protect flooring).
- Confirm the leak type (pressure drop, meter test, moisture mapping).
- Use a proper leak location method (non-destructive detection when possible).
- Repair based on what’s actually leaking, not what looks wet.
A professional Leak Location Service uses the right combination of meter testing, pressure testing, and targeted diagnostics—especially important for Slab Leak Detection and other hidden Leak Detection problems.
What We Commonly See in North Texas Plumbing Systems
North Texas homes see a mix of aging plumbing, shifting soil, and seasonal temperature swings. A few patterns we run into during Professional Leak Detection calls:
- Slab leaks that show up late. You might not see water, but you’ll see changes: floor temperature differences, minor cracking, recurring damp odors, or unexplained humidity.
- Water pressure irregularities. Some hidden leaks cause steady pressure loss; others create intermittent flow that’s hard to catch.
- “Bathroom-only” symptoms that aren’t only bathroom. A toilet that runs or a supply line that sweats can mimic a larger problem—or mask it.
Firsthand technician observation (what we check immediately)
On emergency calls, we often find that homeowners have already shut off one fixture supply valve, which limits water in that room—but doesn’t stop the leak if the issue is closer to the main line or under the slab. When we arrive, we verify whether the leak is still present by checking system pressure and water flow behavior after shutoff. That single step prevents a common misdiagnosis where the “symptom” stops, but the leak continues underneath.
Leak Location Response Checklist (Do This in Order)
1) Confirm it’s a leak—not just a fixture
Start with fast checks:
- Listen for water running when everything is off (no appliances, no toilets refilling).
- Check under sinks and around visible plumbing connections for fresh moisture.
- If you have a water meter, watch it for movement (see step 2).
2) Do a quick water meter test (best for “hidden” suspicions)
- Turn off all faucets and confirm no toilets are refilling.
- Locate the water meter and look for a leak indicator (some meters show a small dial/indicator).
- If it moves when nothing is running, you likely have a Water Leak Detection issue—not a normal household cycle.
3) Shut off water to limit damage
- If water is active (dripping, soaking, bulging drywall), shut off the main.
- If you only suspect a hidden leak, shut off the main if you can do so safely and quickly—especially if you notice moisture spreading or a musty smell starting.
4) Protect property while you wait
- Move valuables and electronics away from the suspected area.
- If there’s dampness on floors, reduce foot traffic.
- Avoid turning on heaters/AC aggressively in a way that spreads moisture by airflow—ventilation is good, but don’t “cook” wet materials.
5) Identify the likely leak category (so the right tools get deployed)
Ask yourself:
- Is the issue near a bathroom/utility wall (supply lines)?
- Do you have floor temperature differences or cracks near slab areas (possible Slab Leak Detection)?
- Is there a sewer smell, slow drains, or gurgling (possible sewer line involvement)?
This helps the technician bring the correct approach. For example, slab and in-wall leaks often require Leak Location Service methods like acoustic tools, pressure tests, and moisture mapping—while drain and sewer issues need different diagnostics.
6) Request diagnostics, not guesses
When you call for help, ask:
- “Can you confirm if this is under-slab or in-wall?”
- “Will you use pressure testing and a leak location method before opening anything?”
- “How do you determine whether it’s a slab leak vs. another plumbing failure?”
That’s how you avoid unnecessary demolition.
Signs You May Have a Hidden Leak
Hidden leaks are sneaky. Common signs include:
- Unexplained water bill increases
- Flooring that feels cooler near one wall or room
- Hairline cracks that widen slightly over time
- Damp drywall or peeling paint without a clear source
- Musty odors that appear and linger
- Slow toilet “refill” behavior that returns even after you address visible causes
- Water hammer noises (sometimes tied to pressure changes)
If you’re seeing more than one of these, it’s worth escalating to professional detection sooner rather than later.
Mistakes That Lead to Water Damage
Common mistake homeowners make: “I don’t see water, so it can’t be serious.”
That’s the biggest misconception. With slab plumbing, the leak can be happening under the surface while the home looks mostly fine. Moisture can travel into surrounding soil, and foundation conditions can worsen as the leak persists.
We also see these other missteps:
- Only shutting off a single fixture supply valve. That can reduce symptoms but not stop the underlying leak.
- Ignoring recurring moisture. Even “small” wet spots can become persistent if the source is continuous.
- Trying to patch cracks without leak confirmation. If you seal or repair the surface before locating the source, you may trap moisture and delay real repair.
- Using leak sealants without diagnosis. Some products can complicate later pressure testing and repairs.
Repair, Diagnostics, or Prevention: What Actually Works
The right diagnostic path depends on the leak type
Here’s how we typically recommend thinking about it:
- If you suspect slab plumbing: prioritize slab leak location diagnostics before breaking concrete. Non-destructive methods reduce damage and help target repairs.
- If you need it, you can review our approach to slab leaks and how we handle slab leak location and repair when the leak is confirmed.
- If you suspect an in-wall or pressurized water line: the goal is to isolate the segment and verify which line is leaking before opening walls.
- Our leak location repair process focuses on finding the source, then selecting the least disruptive repair option.
- If it’s a drain or sewer symptom: don’t force it into a “water leak” category. Sewer and drain lines have different failure modes and require different tools.
- If your issue involves recurring backups or slow clearing, consider sewer repairs—especially when roots, buildup, or line deterioration is suspected.
Quick comparison: repair vs. replace (for long-term peace)
Not every leak means full replacement. But sometimes it does. A practical rule our technicians use:
- Repair makes sense when the pipe segment is localized and the surrounding plumbing is in decent condition.
- Replacement makes sense when multiple areas fail, the line is deteriorated, or the same problem returns repeatedly.
For slab issues, we often evaluate whether the leak is isolated or part of broader piping wear. That’s how you avoid doing one repair and then fighting the next failure six months later.
A realistic anonymized service case (how diagnostics prevented extra damage)
A property manager in the Keller area reported dampness near a kitchen wall after a tenant notice. The initial assumption was a leaking sink trap. We confirmed with a meter test and pressure behavior that water use continued even when fixtures were off. Moisture mapping showed a pattern consistent with under-slab moisture migration. Instead of opening the wall first, we performed targeted slab leak diagnostics and confirmed the leaking segment. The repair addressed the source directly, and the team avoided unnecessary wall demolition.
Keller / North Texas Relevance: Why Location Matters Here
In North Texas, many homes have slab foundations, and our soil conditions can change with seasons. When a leak sits under a slab, it doesn’t just create moisture—it can contribute to conditions that worsen cracking, settlement, and ongoing moisture movement. That’s why we emphasize Under Slab Leak Detection early.
We also see higher demand for leak detection during periods of heavier water use—summer irrigation cycles and higher household consumption can mask the early warning signs. A leak that might be “manageable” in spring becomes more expensive when the system is under constant load.
If you’re looking for a starting point, our team supports water, sewer, and gas diagnostics so homeowners can get clarity on what’s actually happening before repairs begin.
What Homeowners Often Overlook
- Moisture can migrate. The wet spot may not be directly above the leak.
- Temperature differences are a clue. Under-slab leaks can change how floors feel.
- Leaks can be intermittent. Pressure changes from irrigation or household demand can trigger or hide a leak temporarily.
- Early leak detection reduces repair scope. The longer a leak continues, the more materials you may need to remove and replace.
Plumbing Maintenance Checklist (Prevention You Can Actually Use)
- Monthly: Check for persistent damp odors and look for small cracks near bathrooms and exterior walls.
- Quarterly: Run a quick “fixtures off” check—listen for unexpected water sounds.
- Seasonally: Inspect under sinks and around toilets for sweating, corrosion, or slow dampness.
- Every 6–12 months: If you have older plumbing, consider a professional inspection for pressure issues and hidden leaks.
- After storms: If you notice drainage problems or new moisture spots, investigate promptly.
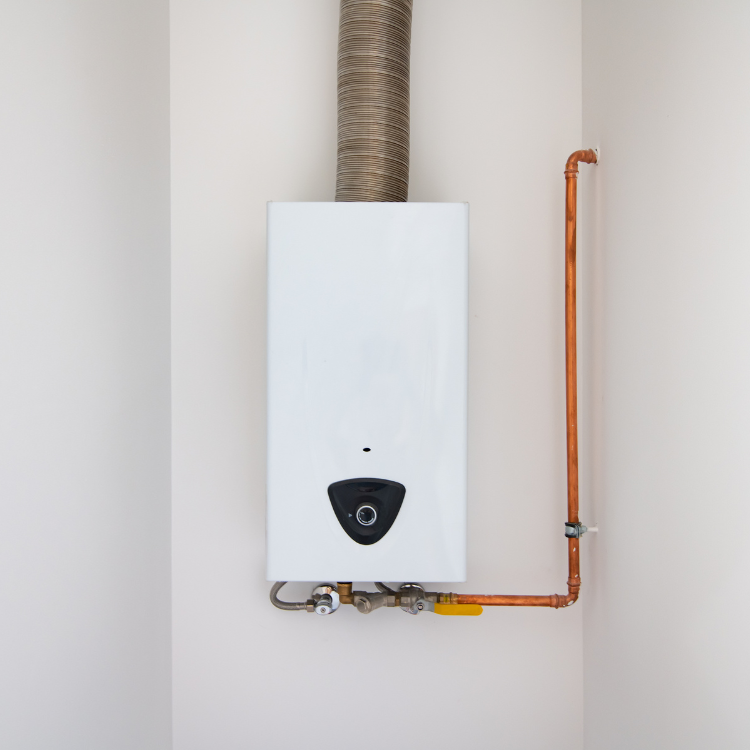
- Tankless note (if applicable): Keep up with recommended tankless maintenance so mineral buildup doesn’t worsen pressure and performance over time. (If you want a reference, we handle tankless water heater repair and installation as part of ongoing water reliability.)
Emergency vs. Non-Emergency: When to Act Fast
You should treat it as an emergency if:
- Water is actively spreading or soaking materials
- You suspect under-slab moisture that’s increasing
- There’s an ongoing musty odor developing quickly
- You can’t determine the source and the meter indicates continuous flow
If it’s not actively damaging property but you still suspect a hidden leak (bill increase, periodic moisture), schedule diagnostics soon. Hidden leaks rarely improve on their own.
Key Takeaway
The peace you want comes from knowing the source—not from guessing. Shut off water if needed, protect property, then rely on the right leak detection and leak location methods so repairs are targeted and durable.
Repair Recommendation (Concise)
If your symptoms suggest a hidden leak—especially near slab areas—request a Leak Location Service that includes pressure testing and moisture mapping/non-destructive targeting when possible. Once the leak segment is confirmed, proceed with a repair plan designed to prevent recurrence rather than only treating the visible symptom.
FAQ
How do I know if I have a slab leak vs. a fixture leak?
Slab leaks often cause floor temperature differences, recurring dampness, or cracks that don’t line up neatly with visible plumbing. A fixture leak usually appears near a specific supply line or connection and often changes when you shut off that fixture. If your meter indicates water movement with all fixtures off, that’s a strong sign to escalate to professional leak location diagnostics.
What causes hidden water leaks in North Texas homes?
Common causes include aging supply lines, pipe corrosion, shifting clay soil affecting seals and joints, and pressure changes over time. In some cases, a leak starts small and stays hidden until moisture migrates or material conditions worsen.
Is non-destructive slab leak detection really possible?
Often, yes—depending on the leak type and what access is available. Many diagnostics methods focus on locating the leak with minimal demolition first. The goal is to confirm the source before opening concrete or walls whenever feasible.
Should I call emergency plumbing or schedule routine leak detection?
If you see active water intrusion, rapid moisture growth, or continuous meter flow, treat it as emergency service. If it’s only an unexplained bill increase or subtle moisture that isn’t spreading, scheduling professional Professional Leak Detection soon is still the right move.
Ready to Protect Your Home From Plumbing Damage?
If you’re seeing signs of a hidden leak—especially near slab areas—early diagnostics can save you from unnecessary demolition and bigger repair bills. All Source Plumbing helps Keller homeowners pinpoint the source quickly and repair with a long-term plan.
About All Source Plumbing
All Source Plumbing provides slab leak detection, leak location and repair, drain repair and hydro jetting, sewer diagnostics and sewer repairs, tankless water heater services, and emergency plumbing repairs throughout Keller, TX and surrounding North Texas communities. The company focuses on accurate diagnostics, long-term repair solutions, preventative maintenance awareness, and helping homeowners protect their properties from costly water damage.