Warranty-Backed Plumbing Services in the Fort Worth Area
When it comes to plumbing, finding a reliable and trustworthy service can feel overwhelming. The fear of hiring an inexperienced plumber and potential issues with quality often complicate the decision-making process. Luckily, our licensed plumbers at All Source Plumbing can professionally resolve issues and prevent future problems, ensuring your plumbing system runs smoothly. From leak detection and repair to commercial plumbing, we handle it all. Our experienced plumbers service Keller, Watauga, Colleyville, Southlake, North Richland Hills, Richland Hills, Bedford, North Fort Worth, Saginaw, Hurst, and surrounding areas in Tarrant County.
When you choose All Source Plumbing, you’re choosing a business that puts you first. We’re available 24/7, offer same-day service, and provide emergency plumbing help when you need it most. Our team is dedicated to doing the job right the first time. We back all our work with a warranty and a satisfaction guarantee. Financing options are also available because we believe everyone should have access to top-quality plumbing services without breaking the bank.
Contact us now at (682) 760-4912 or fill out our online form to get a free estimate from our plumbers in Keller, TX!
WORK WITH A TRUSTED & EXPERIENCED BUSINESS


Backed by a Warranty
Talk to our team about our plumbing services warranty!
Licensed & Insured
We make it easy for you to have confidence in the team you call.
Financing Options Available
Our flexible financing options support you however you’d like to pay.
Contact Us for a Free Estimate
Get started by giving us a call and setting up a free estimate.


Innovative Plumbing Solutions in Keller
As part of our commitment to providing exceptional plumbing services, we continually integrate innovative plumbing solutions to meet the evolving needs of our clients. Modern plumbing challenges require modern solutions, and at All Source Plumbing, we use the latest technologies such as trenchless plumbing repairs, which allow us to fix pipes with minimal disruption to your property. These methods not only preserve your landscaping but also reduce the overall time and cost associated with traditional plumbing methods. We proudly serve residents throughout Keller, Grapevine, Flower Mound, and the entire Fort Worth area.
Modernize Your Plumbing with Smart Technology
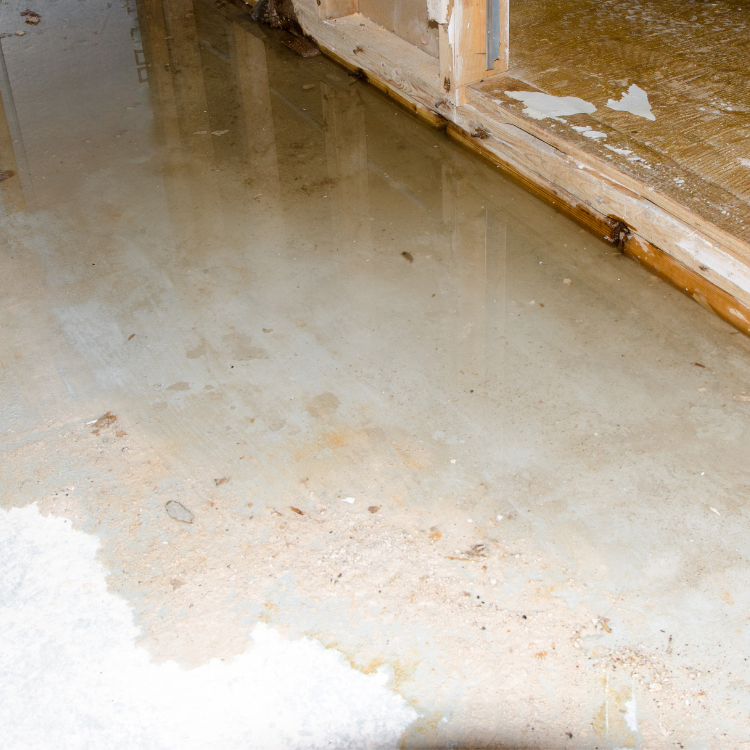
Advanced Water Damage Protection: Automatic Shutoff Valve Installation
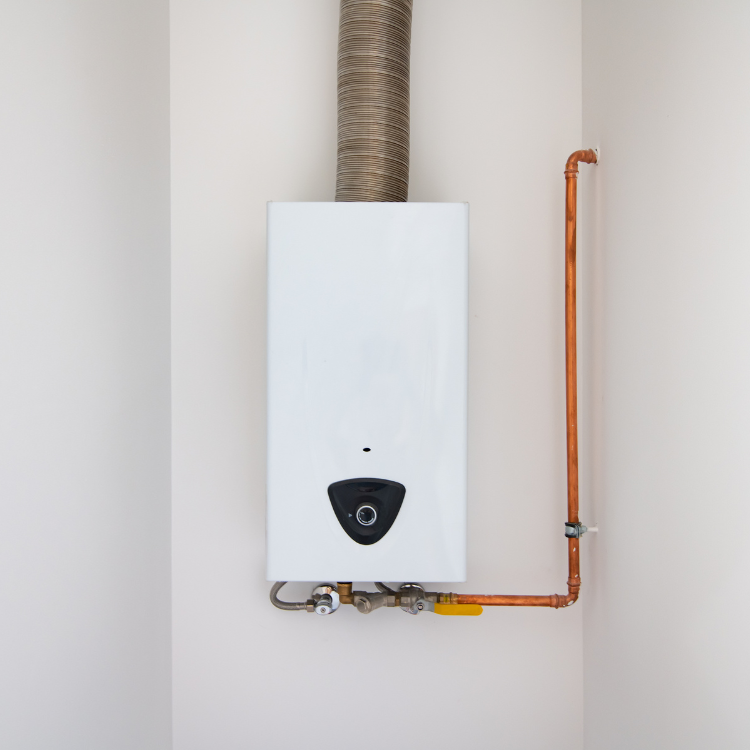
Smarter Water, Smarter Living: Smart Toilets & Water Heaters
- Smart Tank Heaters: Control your hot water schedule and temperature from an app, monitor energy usage, and receive diagnostic alerts. Stop paying to keep water hot when you’re on vacation!
- Tankless Heaters: Enjoy endless hot water on demand. These high-efficiency units heat water only when you need it, saving both energy and space. Our team handles expert installation and any necessary gas line work for seamless integration.
Precision Diagnostics & Service
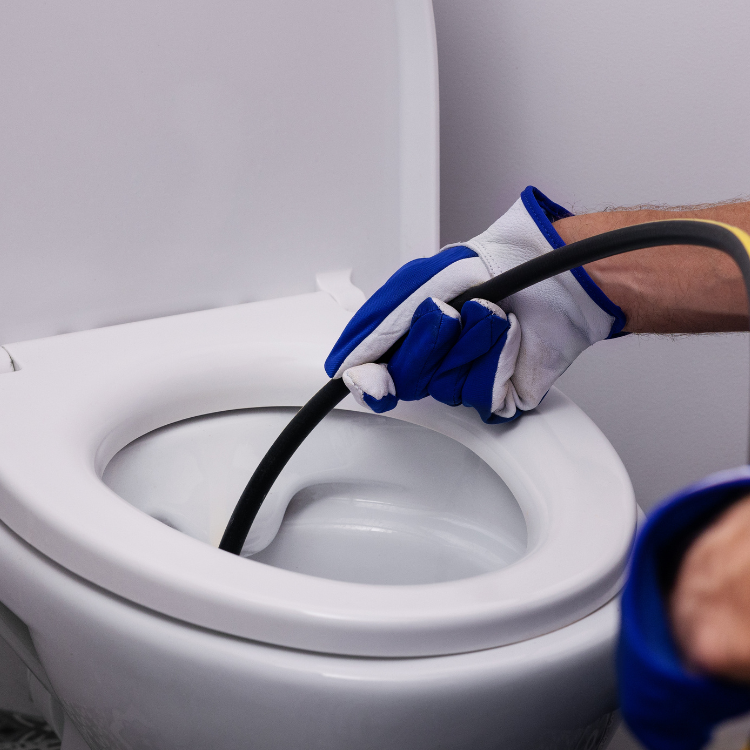
No more guessing! Our high-resolution camera inspections navigate your pipes and sewer lines to pinpoint the exact location and nature of issues—from clogs to cracks—without unnecessary digging. Using specialized acoustic and thermal equipment, we precisely locate hidden leaks in slabs, walls, or underground. This allows for faster repairs, less demolition, and lower costs for you.
Fill Out Our Online Form Or Call Us Today

Warranty-Backed Plumbing Services in the Fort Worth Area
As a Family-owned business in the Fort Worth Metroplex, we bring a sense of integrity, discipline, and service to everything we do. In other words, we are committed to doing the right thing for our customers, every time. Working with us means you have a partner who genuinely cares about your needs and is committed to delivering exceptional results every step of the way. We will treat your property like it’s our own and offer honest, straightforward advice.
We also believe in giving back to the community. Our team actively engages in local projects and initiatives to support the Keller and greater Fort Worth area, ensuring that our work makes a positive impact on the community we serve. This dedication to service is just another reason our customers feel a strong connection with us.
Contact us now at (682) 760-4912 or fill out our online form to get a free estimate from our plumbers in Keller, TX!

• Keller
• Colleyville
• North Richland Hills
• Saginaw
• Tarrant County
• Bedford
• Hurst
• Richland Hills
• Southlake
• Watauga
Don’t Miss Out on These Savings!


Local Fort Worth Plumbing Regulations & Best Practices
In the Fort Worth area, plumbing projects must comply with local regulations to ensure safety and efficiency. Understanding these regulations is crucial for any project, from small repairs to large-scale installations. All Source Plumbing is deeply familiar with Fort Worth’s plumbing codes and works diligently to comply with all necessary permits and standards. We handle the compliance paperwork so you don’t have to worry about the intricacies of local laws.
Owing to Fort Worth’s unique climate, which includes both hot summers and occasional winter freezes, plumbing systems in the area require specific attention. Insulating pipes is a common practice to prevent them from freezing during cold spells, which can avert costly repairs and water damage. Additionally, using weather-appropriate materials ensures that installations are durable and efficient.
Frequently Asked Questions
What Should I Do If I Have a Burst Pipe?
If you experience a burst pipe, the first step is to turn off the main water supply to prevent flooding. Next, contact All Source Plumbing immediately for assistance. We provide emergency plumbing services to address burst pipes swiftly and efficiently. While waiting for our team, try to catch leaking water with buckets and move any valuables to a safe place to minimize potential damage.
How Often Should I Schedule Plumbing Maintenance?
Regular plumbing maintenance is crucial for the longevity of your system. We recommend scheduling a professional inspection and maintenance service at least once a year. Doing so can prevent problems like leaks or blockages from becoming significant issues. Maintenance checks can also improve the efficiency of your system, potentially lowering your utility bills over time.
Why Is My Water Pressure Low?
Low water pressure in your home can be caused by several factors, including pipe clogs, leaks, or issues with the municipal water supply. At All Source Plumbing, we can diagnose and resolve the cause of low water pressure, ensuring optimal performance in your home’s plumbing system. Improvement of water pressure not only enhances your daily convenience but also ensures that appliances using water function correctly.
Can I Upgrade My Plumbing Fixtures?
Upgrading plumbing fixtures is a fantastic way to enhance the aesthetics and efficiency of your home. Whether you’re looking for a new showerhead, faucet, or energy-efficient appliances, All Source Plumbing can assist with both the selection and installation process. Upgraded fixtures can save water, reduce costs, and add value to your property.
What Are the Signs of a Hidden Leak?
Some signs of hidden leaks include unexplained increases in your water bill, damp or moldy spots on walls or floors, and a persistent musty smell. If you suspect a hidden leak, it’s essential to contact All Source Plumbing immediately. Our advanced equipment can identify and fix leaks without causing unnecessary damage to your property.